Once the certificate is coming close to expiration, here are a few things that need to be checked before you can perform the certificate upgrade, please perform the upgrade after hours as installing the certificate will cause the application to restart
- Go to “Administration and click on certificates “
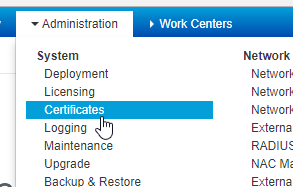
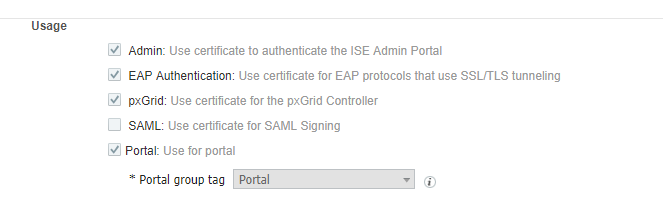
2. Choose the certificate that you need to renew and click on edit to see all the roles that are assigned to that certificate – in this case, the certificate is being used for the roles below, and make a note of what roles you will need to assign with the certificate renewal. also, export the current certificate to make sure you have a backup copy
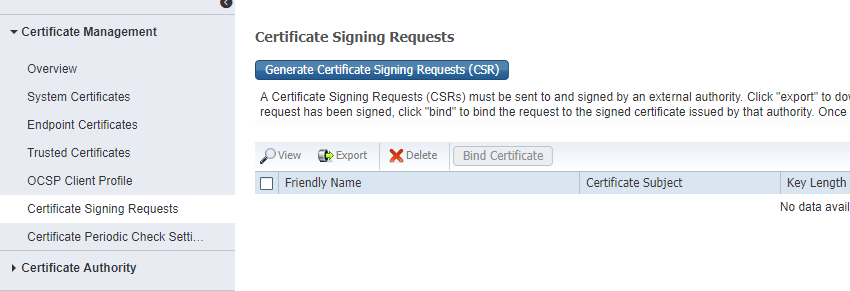
3. Generate the CSR by going to Administration and Certificate Signing Requests to generate the request by clicking on the Generate Certificate Signing Requests (CSR)
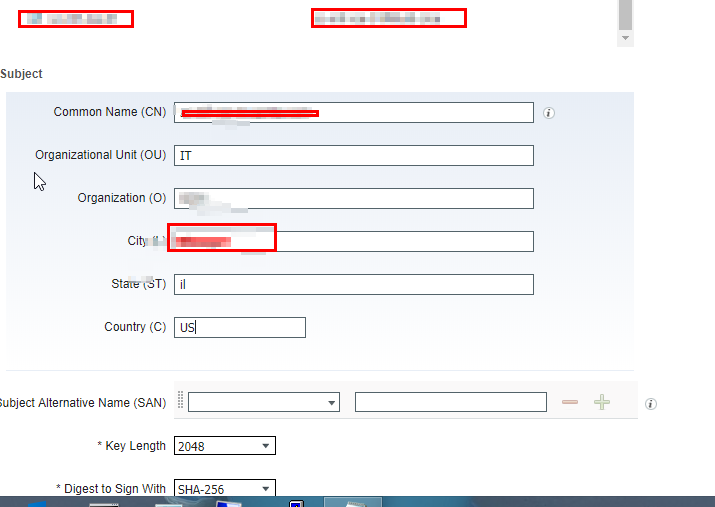
Choose Multi-Use and pick the ISE node to that you are going to upgrade the certificate for.
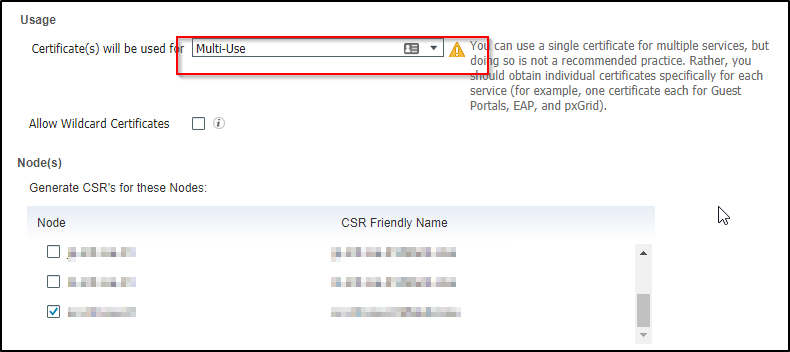
Add the values and fully qualified domain name for the certificate signing request.
The above info will generate a CSR which is saved in a PEM format
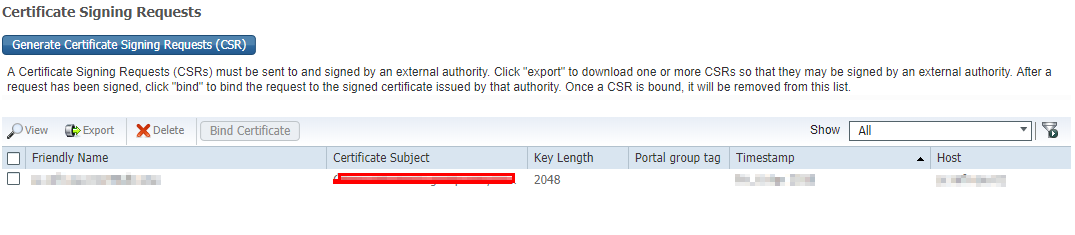
Once the CSR is requested then you can export the the CSR which is then saved to our download folder with the .Pem extension
![]()
Open the downloaded file with the notepad or any other text editor and copy the content – this will be needed to request the certificate from the CA. Use the cipher to generate the certificate and once the request is complete then you can download the certificate and bind to host name in ISE
Most providers give you the options for download platform however Cisco ISE may not be listed but you can download as Apache and the extension may be certificate name .crt which works just fine with Cisco ISE
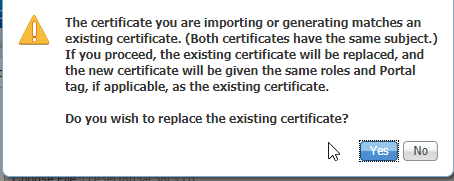
One thing to note description name has to be different if you have a certificate with the same name and it may not let you replace it and in that case, you can just add 01 or 02 at the end and it should the work
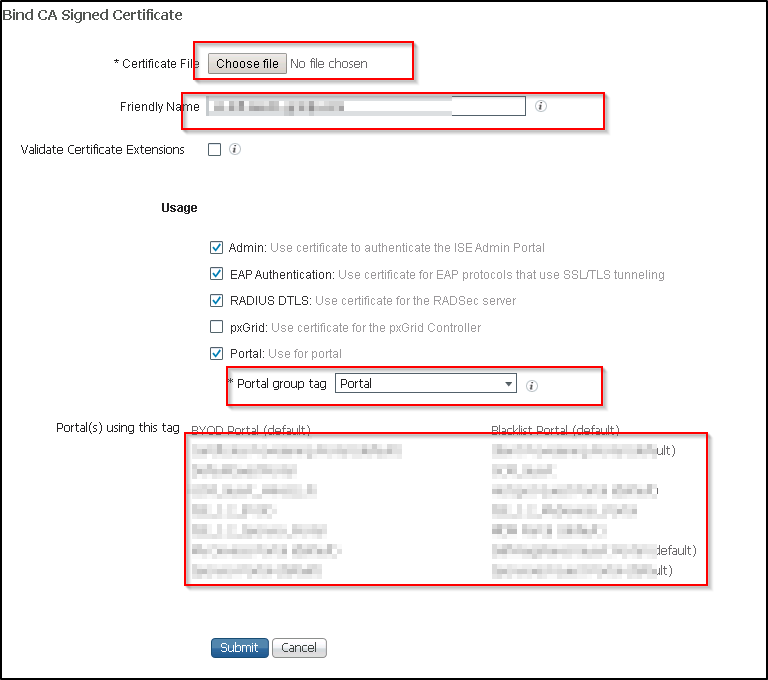
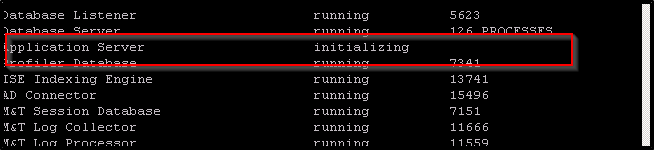
Below is where you can change the description name and that is how you will need to bind the certificate and what services you need the certificate for – as I mentioned previously that make make a note of what services will be used for this certificate and once you click submit then it will restart the application
This should be done after hours to minimize any sort of downtime and once the application server comes up then you should be able to see the green box next the newly added certificate and updated expiration date for the certificate
See the screenshot below after the certificate is applied.
If you are not able to replace the certificate in place, I have another article that explains the workaround.
Thanks for reading this and let me know if you find something that is not accurate