[solved] how to install and configure the Cisco Umbrella Active directory script and windows connector step by step

Cisco Umbrella previously known as OpenDns protects network traffic at the DNS level and can protect traffic any many levels and also has the capability to integrate with Microsoft Active Directory.
There are two type of implementations, one with VA and the other without VA, where VA stands for “Virtual appliances”
One thing to note that Cisco Umbrella does not support Windows 2008 R2 any more and minimum version that is supported is now Windows 2012 server.
You will also need an “Active Directory Service Account” that will be used during the installation and you can have maximum of “two connectors” in the environment.
You will need to login to the Cisco Umbrella portal first to download the script and Windows connector files assuming the account is already set up.
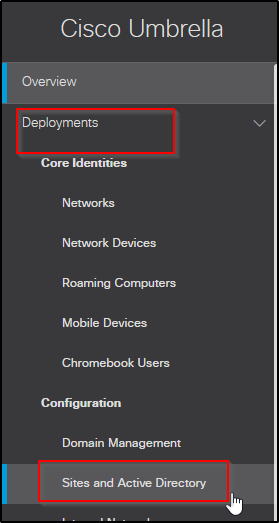
Once you are logged in then you can navigate to “Site and Active Directory” under “Deployment” on the left pane
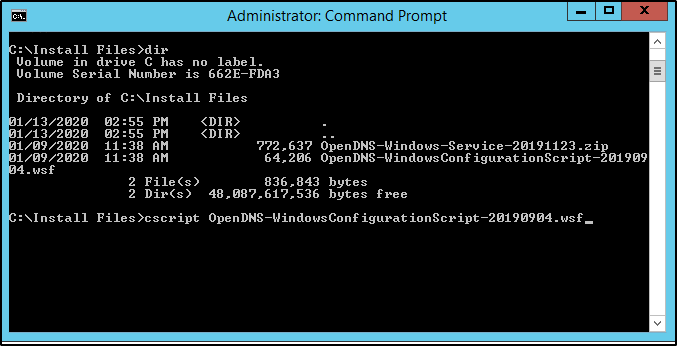
Once you have downloaded the files then you can save them in the folder and run the command prompt the from the install locations and please note that it needs to run on the domain controller.
The command to execute is “cscript + filename.WSF”. This will kick off the script
Next prompt should be yes as it will auto configure the rest of the settings and choose “Y” to continue.
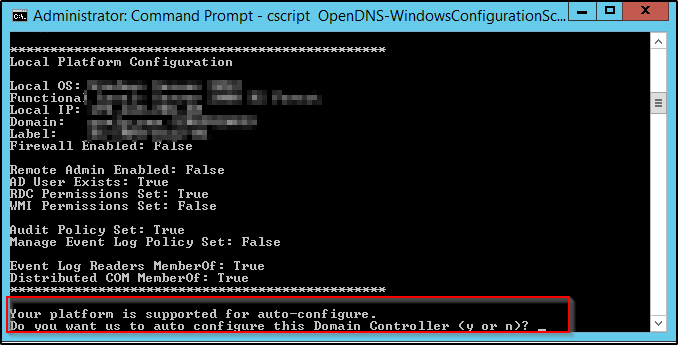
Lastly it will resister your domain controller and that should be it.
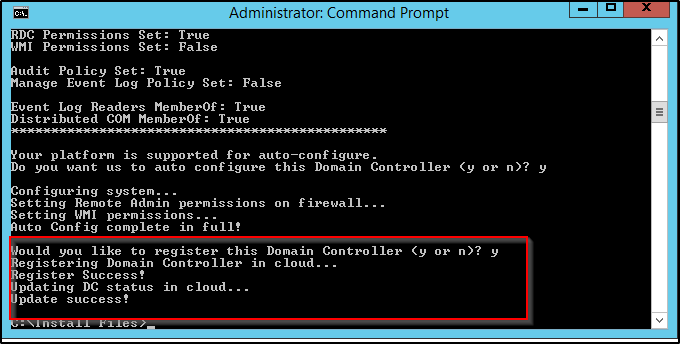
Now the script has ran and completed, you can validate this in the portal – screenshot below where it shows AD server and shows as “green” .

“Windows Connector Installations”
Windows connector Securely communicates non-sensitive user and computer group info to the Cisco global network.
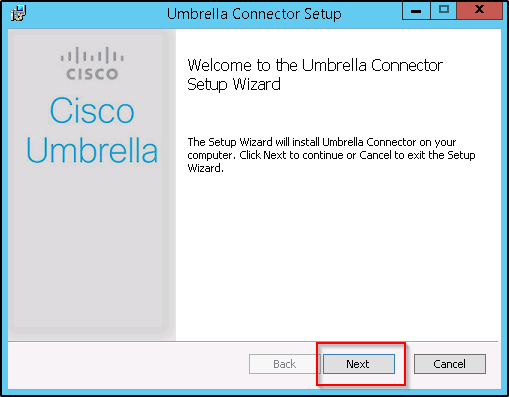
Next step is too run the windows connector file, go back to the folder where you have downloaded the file.

Click on the setup to start the installation.
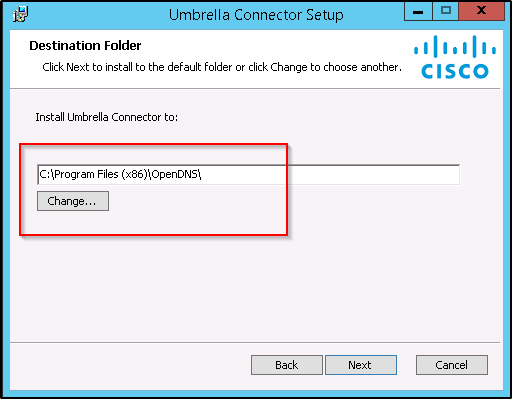
Click “Next” to continue to go to the next step and choose the location.
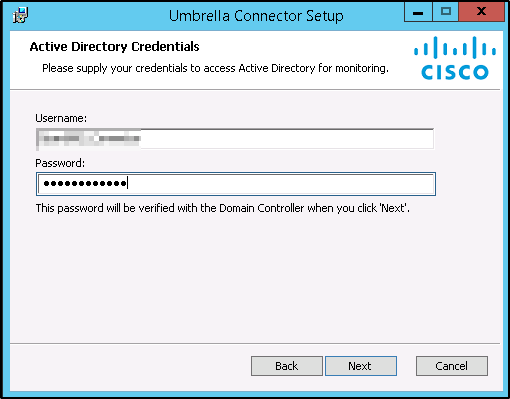
This is where you will need to add the “Active directory service account name and password” .
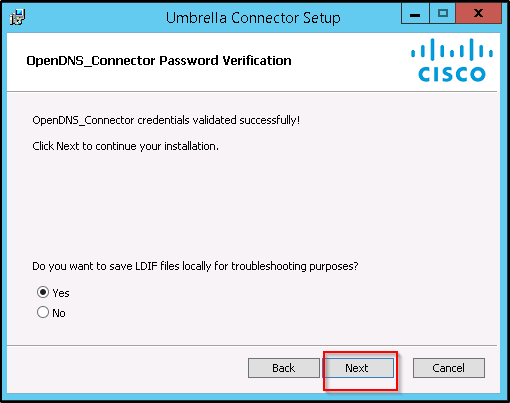
Choose Yes to save the log files locally for troubleshooting for later on.
Choose Next to go the final screen.
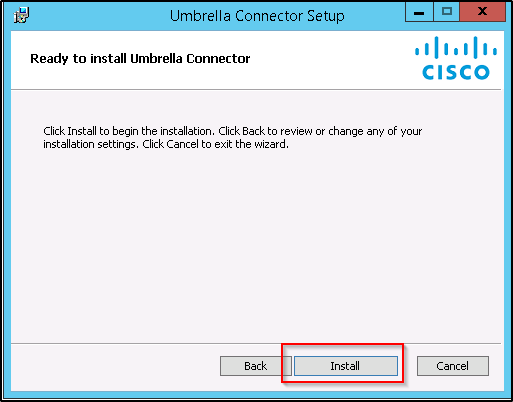
Choose “Install” to install the connector.
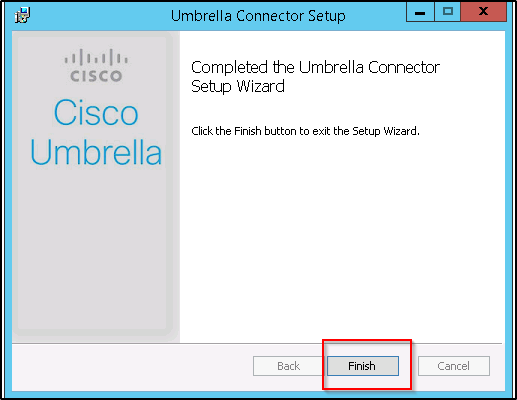
Click on Finish to exit out of the installation. Now you can go to the portal and you will see your AD server as a connector there. The connector is used to sync AD objects to the portal and it is done once in a 24 hour period. by default the schedule is set on the portal for 4:00 AM to 6:00 AM and can be changed per your wish.
Thanks for reading the article and I hope it has provided some value