Step by step to setup the Azure express route with the Century link provider. This assumes that you already have an Azure AD tenant and a VNET already built in.
The steps are the same for any other provider except they may have a different provisioning portal.
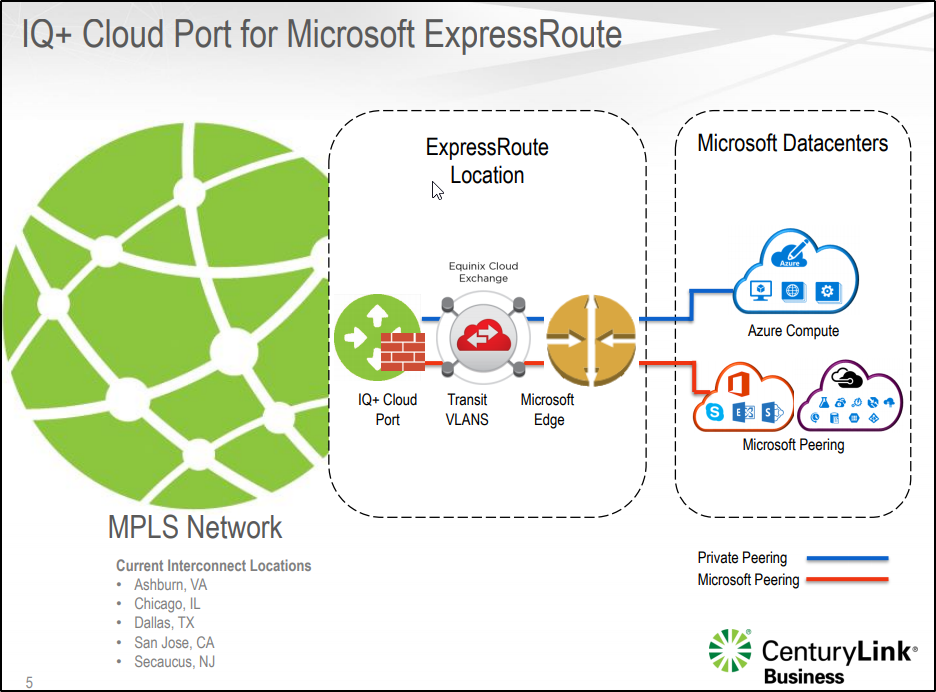
below is the diagram from the Centurylink document
Reference link
Reference diagram
There are 5 steps.
- Order the Crossconnect in your data center thru Centurylink.
- Create a Azure express route on the Azure tenant portal.
- Create a dynamic connection in the Centurylink/Level 3 portal.
- Configure the router on the on premise side.
Let’s start with # 2 by creating the Azure express route in the Azure portal.
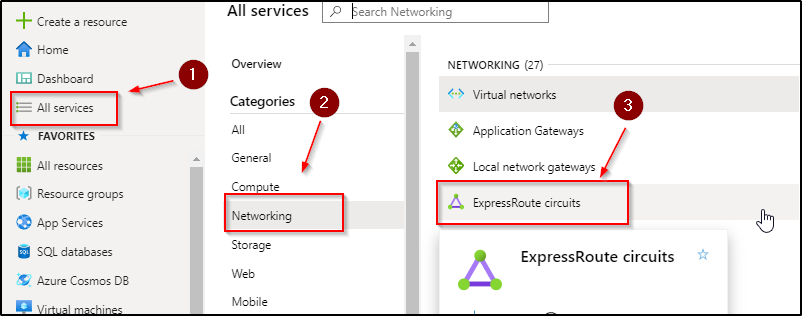
Login into the Azure AD tenant by going to the https://portal.azure.com navigate to “all services”
- All services
- Networking
- ExpressRoute Circuits
You can click on click on the Create Express route and click next
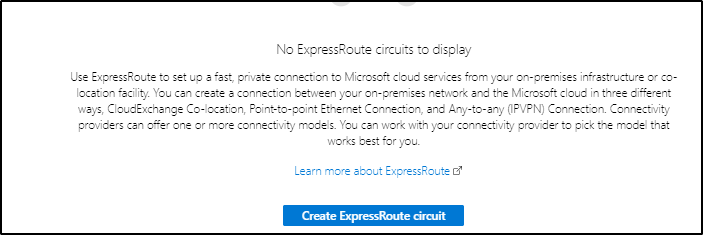
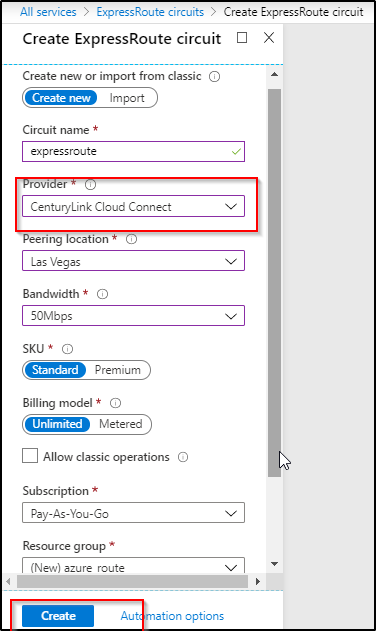
Below is what you will need.
- Name the route
- Choose the provider
- choose the peering location
- choose your bandwidth
- choose your subscription
- choose the resource group, you can create a new one too
- Click on create to create the express route
Once it has been configured and created then you can click on to see all the details and you will need the “service key” to provision the circuit in the Centurylink cloud portal.
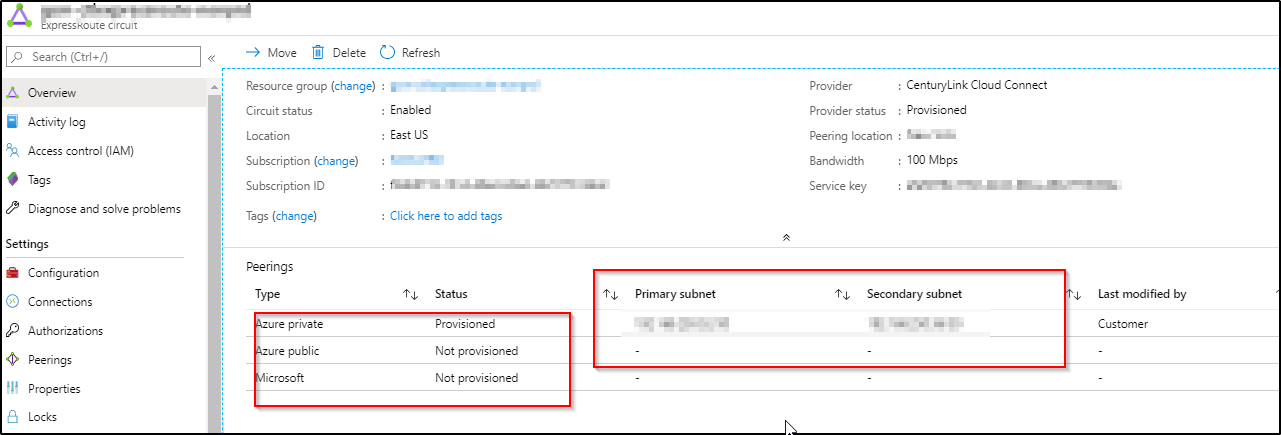
There are three different types of peering that you can do and I am going to go over the private peering for now.
You will need to two /30 ip addresses block for creating the BGP relationship. Azure also requires inner and outer VLANS
Now login tot he CTL portal by going to the following link with your username and password and the assumption is that you have already signed a contract to provision a new circuit.
https://www.centurylink.com/business/login/
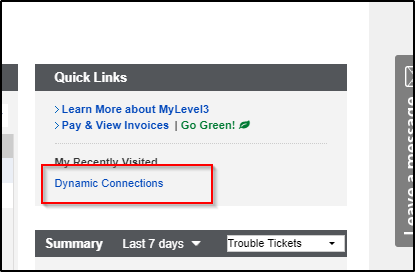
Once you are logged in, you will need to click on “Mylevl3” on the right side

You can click on the “Dynamic connections” to create a new connection
You will need to choose your location and the cloud vendor location which in Azure in this case. There are two vlans you will need to define and service key from the Azure portal in the previous step.
Choose the bandwidth and name the connection and click next to complete the connection.
![]()

Now the last step is complete the router configuration on the CE router which is most likely your data center.
below is the sample configurations that you will need
interface GigabitEthernet 0/0
no ip address
speed 100
no negotiation auto
interface GigabitEthernet0/0.100101
description “Azure Primary”
encapsulation dot1Q 100 second-dot1q 101
ip address x.x.x.x x.x.x.x
interface GigabitEthernet0/0.200201
description “Azure Secondary”
encapsulation dot1Q 200 second-dot1q 201
ip address x.x.x.x x.x.x.x
I had difficulty finding the Microsoft AS number in the documentation, so I ended up debugging the BGP session and you can see the message that ti actually tells you that you are peering with the wrong AS in HEX value
see the screenshot below

Once the connectivity has been established then you should be able to see the arp table for both end and you should be able to ping across the links. you will see it is active in the CTL portal.
![]()
You are now ready to configure BGP and start routing internal routes.
Thanks for reading this, let me know if this is not accurate or missing anything so I can update.
Happy routing 🙂