How to create site to site Policy based VPN tunnel between Azure and Cisco ASA step by step
Below are the steps to create a Azure VNET IPSEC tunnel to Cisco ASA on premise
Follow the step by step configurations
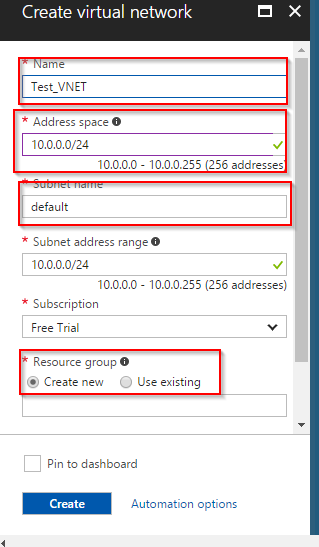
Create a VNET which is like creating a Virtual Data center by clicking on the + sign+Networking+Virtual network

Below are settings you will need to input
- Name of the Virtual Network
- Address Space – I recommend creating /16
- Name of the Subnet – you can have one big subnet and control access by Security Groups
- Will need to define the subnet range
- You can have multiple subscriptions – Choose the one you like
- Create a new Resource group unless there is one you want to use and is created

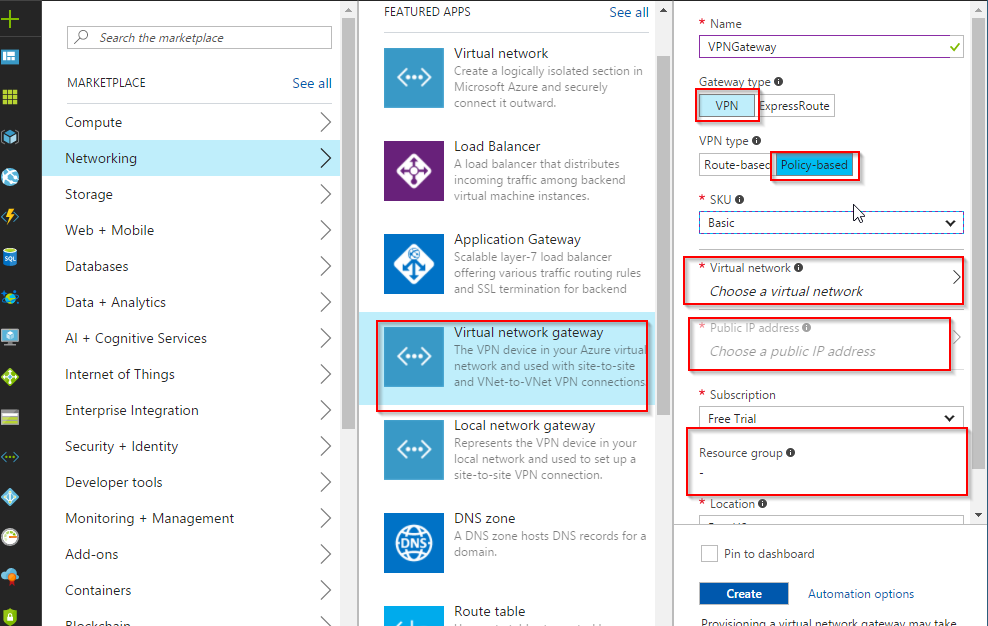
Create a Virtual Network Gateway clicking on the + sign and adding the following values
- Name of the Gateway
- Choose “VPN”
- Choose “Polic Based”
- Choose the VNET that you created initially in the previous step
- Choose Public IP will give you option to create a new IP which will be your Peer IP for IPsec tunnel

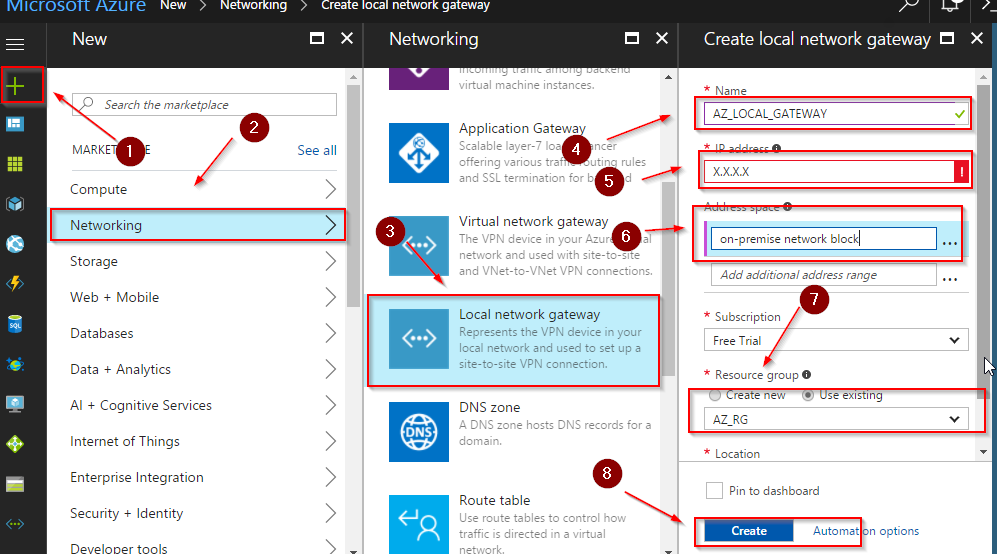
You will now need to create Local Gateway and steps are listed below
- Click on the + sign
- Choose Networking
- Choose Local Network Gateway
- Choose the name of the gateway
- Public IP address of the your Cisco VPN ASA
- Local address space behind the Cisco ASA
- Choose the Resource group
- Click on create

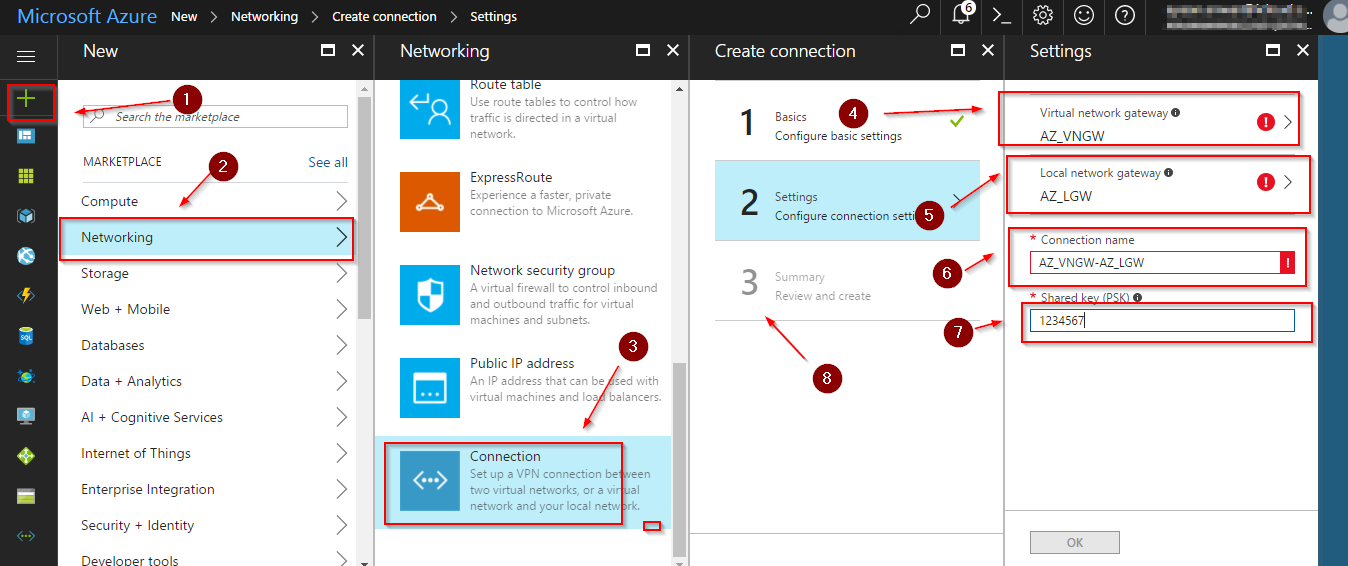
Now you will need to create a connection – steps listed below
- Click the + sign
- Choose Networking
- Choose Connection
- Choose the Name in Basic Settings
- Choose the Virtual Network gateway
- Choose the Local Gateway
- Choose the Connection
- Input the Pre-shared key
- Click to create to create the connection

This completes VPN setup steps in Azure – below are the objects you should see when you are done
- local network gateway
- Virtual network
- Virtual network gateway
- Public IP address
- Connection

Now that the Azure side is completed, you will need to configure the Cisco ASA side

