- Knowledge is power
- The Future Of Possible
- Hibs and Ross County fans on final
- Tip of the day: That man again
- Hibs and Ross County fans on final
- Spieth in danger of missing cut
PulseSecure can be configured in many different ways for authentication and we are going to configure SSO PulseSecure to use Azure AD with SAML.
Below are the summary steps.
- Add an enterprise custom application in Azure for the PulseSecure
- Add SAML server configurations in PulseSecure
- Add an Authentication server using the SAML server configuration in PulseSecure.
- Configure the user realm to use the new SAML authentication server.
Add an enterprise custom application in Azure for the PulseSecure
- log into the Azure portal “https://portal.azure.com”
- navigate to “Azure Active Directory in the portal.
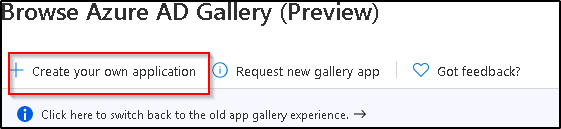
- add a custom application by going to “Enterprise applications” in the left pane
- Choose a New application and there you will have the option to search from the built-in gallery of all the applications if it is available by default.
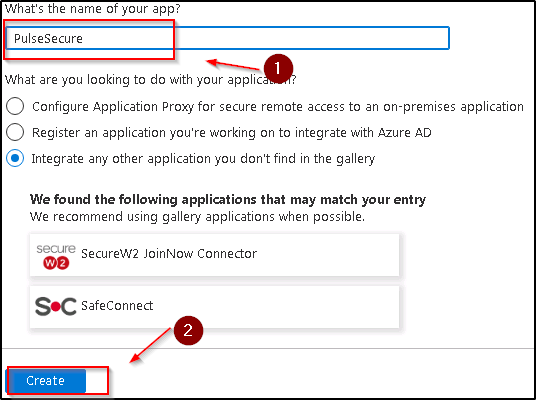
- since PulseSecure is not available by default, you can click on “create your application
- Name your application in the Azure portal.
- Create the application
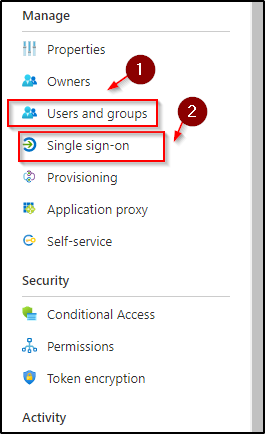
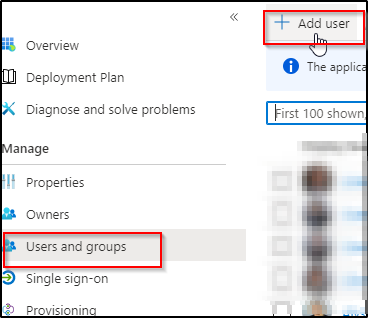
- Once the application is created, go to “Users and groups” and assign the users from your AzureAD
- Next click on the “Single sign-on”
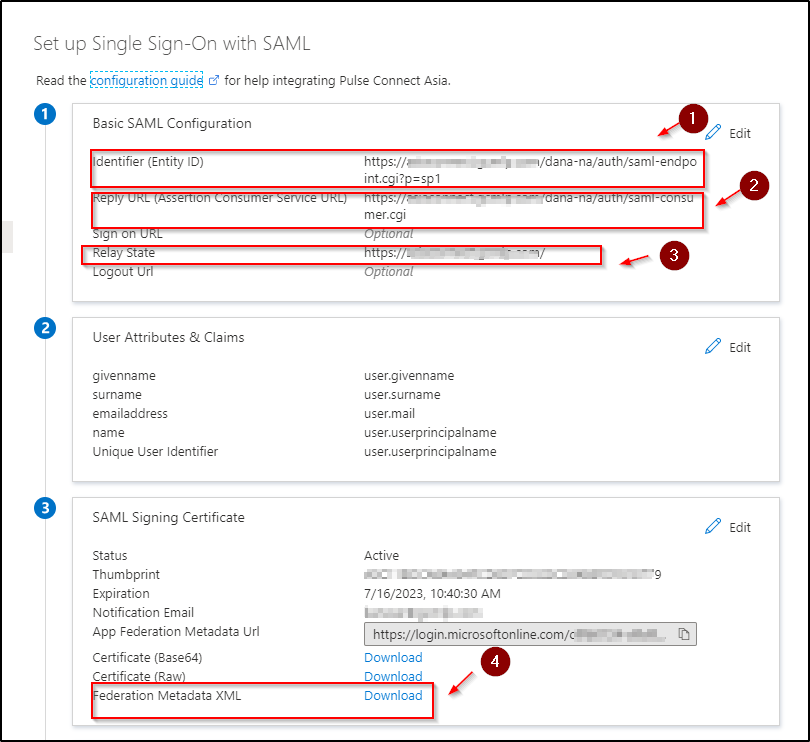
- This is your entity ID URL
- This is your reply URL
- Relay is only used if you want to initiate the session from the AzureAD side.
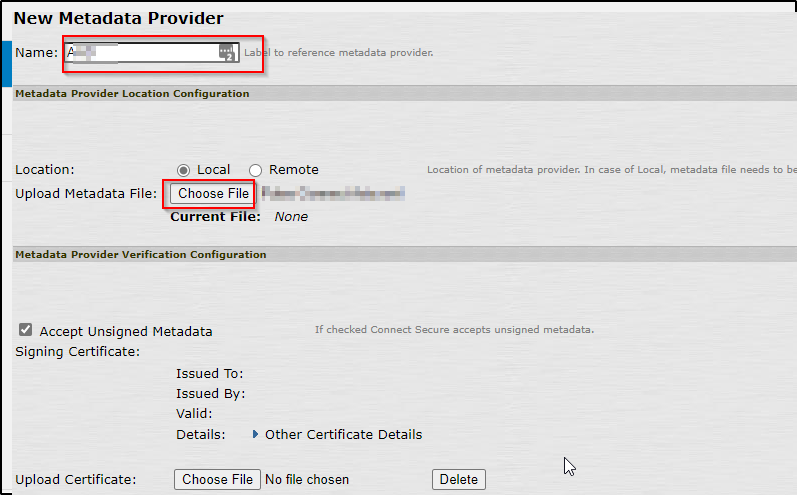
- You will need to download the metadata file which in the later steps needs to be uploaded in PulseSecure when creating an IDP.
You can add users by clicking on Add user and once added they will be assigned to the application.
Add SAML IDP/Metadata configurations in PulseSecure
- Login to the PulseSecure portal by going to https://name.doamin.com/admin with admin credentials.
- Click on the “configurations” and then choose “SAML” to add the SAML configurations
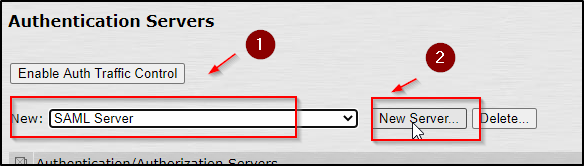
- In the drop-down menu choose “SAML Server” and click on New server
- In the Name field, choose the name you like for the IDP provider, name is only local to the PulseSecure appliance
Add an Authentication server using the SAML server configuration in PulseSecure
- Click on the “Auth Servers” on the left side to add an authentication server, this server configuration will be tied to the SAML configurations that you created in step 1.
- On the next screen, choose the name of the server as pointed out in the below screenshot as 1.
- Choose the “SAML” version as 2.0 and choose the IDP metadata link from the drop-down menu.
- Choose “metdata”
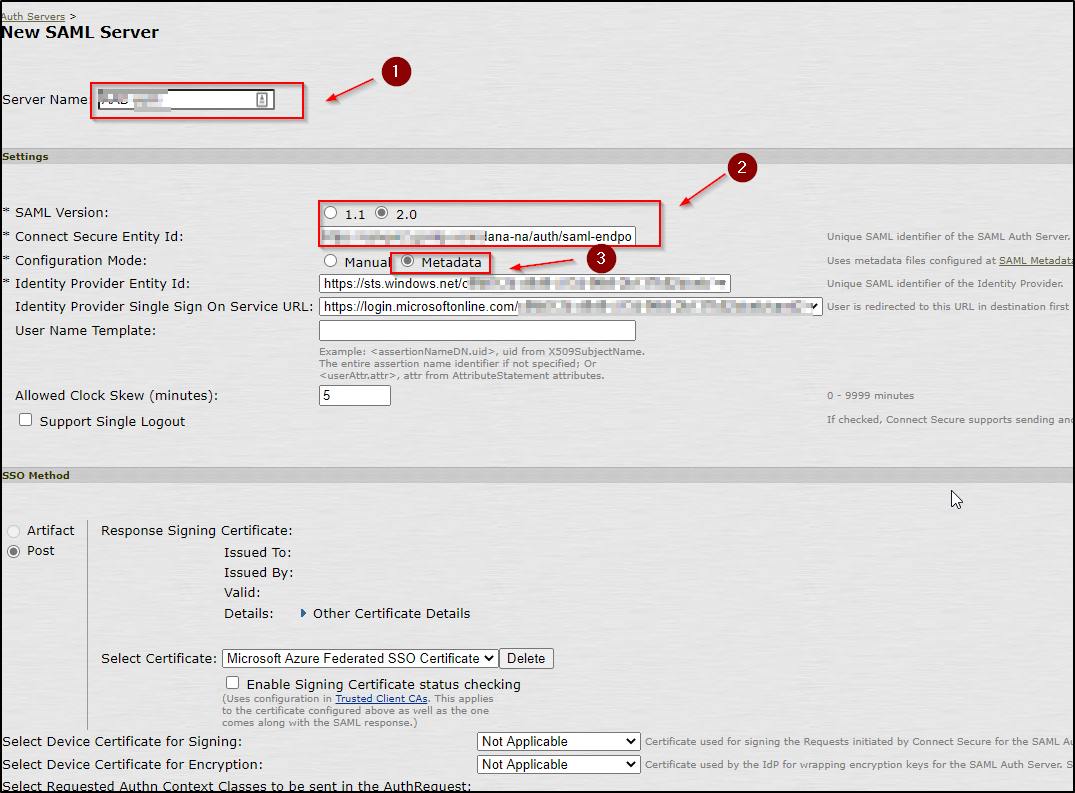
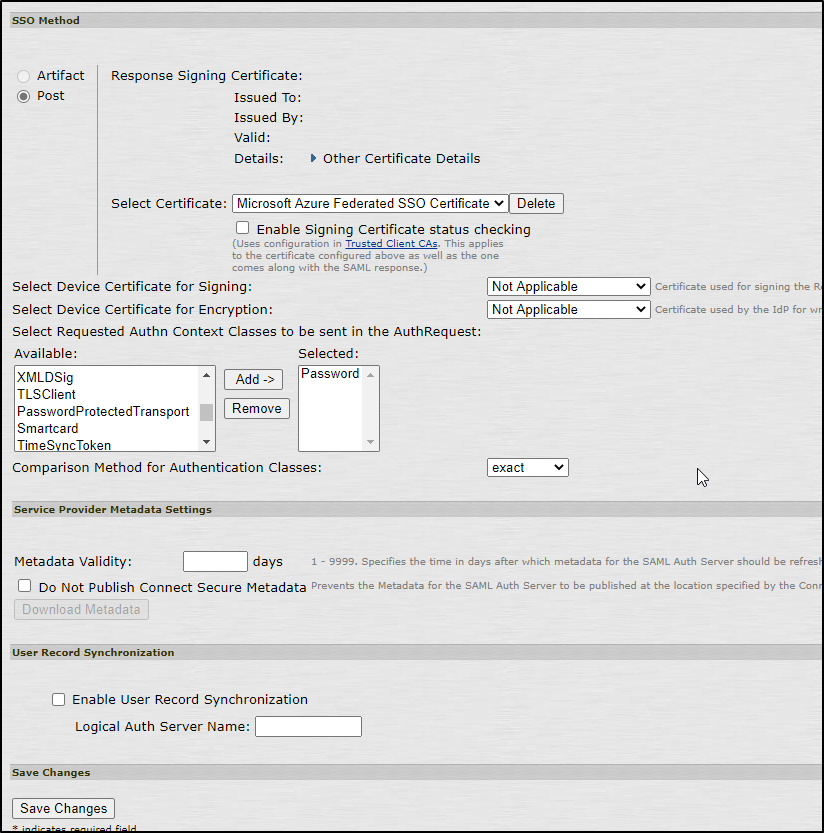
- The screenshot continues and everything else is the default.
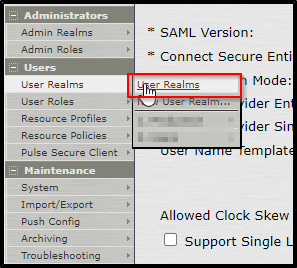
Configure the user realm to use the new SAML authentication server
- Click on the user realms on the left side and pick the user realm that will be tied to the “authentication server” that you created in step 2.
- Go to the user realm which is the default for all the user.
- On the next screen, make sure you are on the right user realm as shown below as # 1.
- Choose the “authentication server” you have created in the previous steps shown below listed as # 2.
- choose the role mapping server which can be a domain controller

The configuration is complete and you can now test to make sure SAML is working properly.