[solved] how to install and configure the NetApp 2700 step by step
solved-how-to-install-and-configure-the-netapp-2700-step-by-step

This article will walk you thru on setting up the NetApp step by step. This particular model is a single chassis with disk array included and is used for small business or if the storage need is small.
below is the physical front panel of the

“Cables Setup”
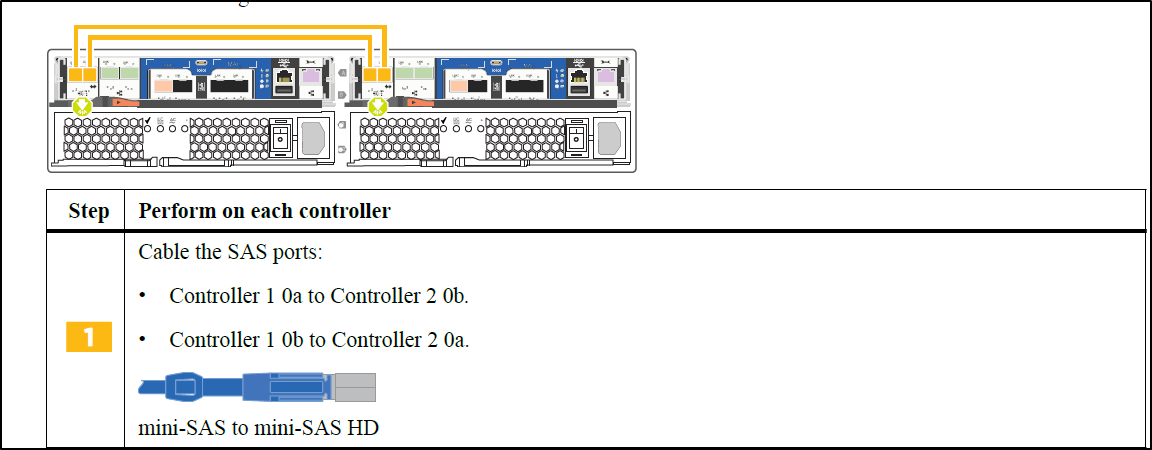
Below is the picture of the cabling the interconnects using the SAS cables.
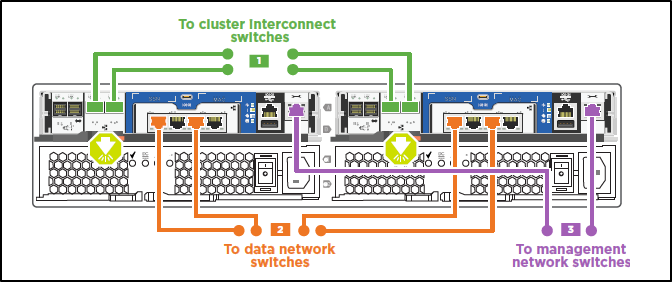
The green shows the cables that are used to connected the Clusters.
The Purple cables are RJ45 copper cables that will go into regular management VLAN which is used for the initial setup and that is how you connect.
Orange cables are used to connect your network and most likely this would be your port channel
Once all the cables are plugged in then you will need to use Putty to console into the serial port using the “115200” speed settings in the putty windows
Once all the cables have plugged in, it is recommended to run the “Active IQ Config Advisor” to validate all the cables are connected correctly and it can be downloaded from the NetApp support site.
Initial Network Setup
use the “sp setup” command to start the setup
You will need a total of “5 management IP addresses”
- 2 for the service processors
- 2 for the management nodes
- 1 for virtual IP address which will be used the access the management interface using the browser
Once you have completed the configuration of the service processors , then you will need to run the cluster setup
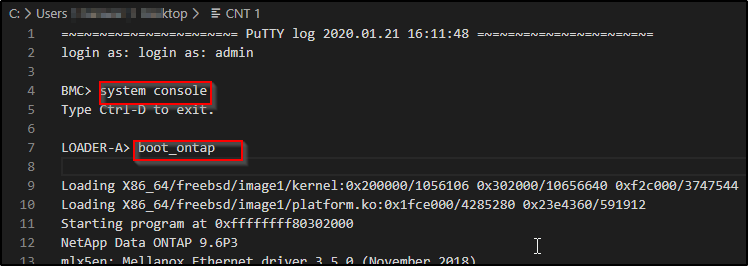
- login as admin
- type “system console“
- type “boot_ontap“
“Cluster Setup”
Once the system is rebooted, it is ready for the cluster setup as shown in the screen below
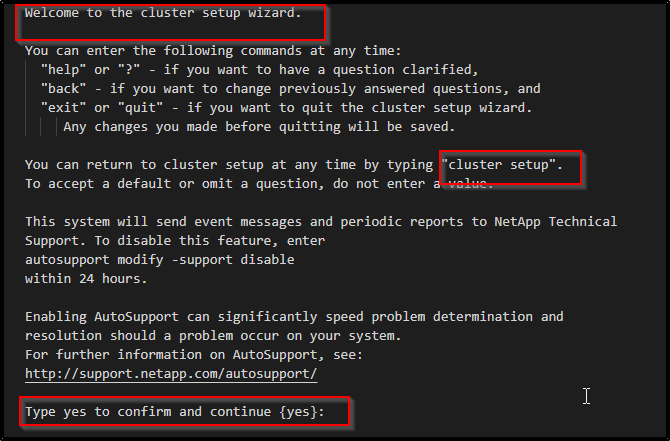
Click yes to start the cluster setup
- It will pick the e0M port by default
- enter the IP address for the management interface for the first controller
- enter the subnet mask
- enter the default gateway
Once the IP address for the management interface is assigned then you can access it using the web browser
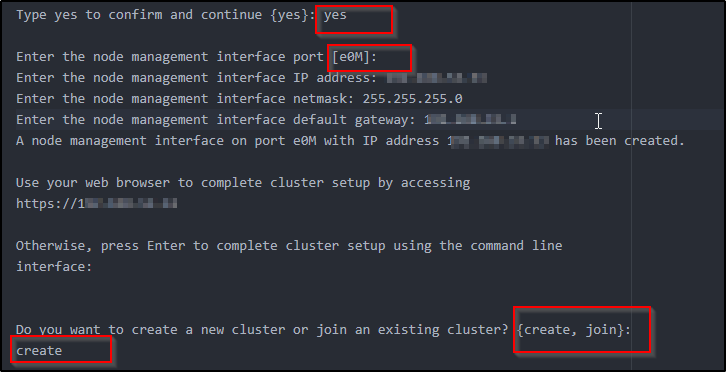
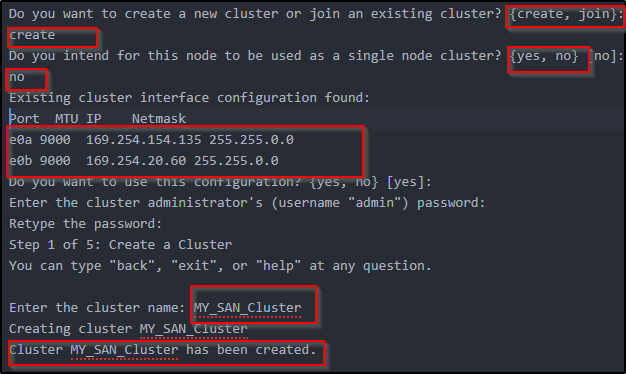
Now you can create the cluster by following the prompts
- choose create to create a new cluster
- choose no to create dual node cluster
- it then finds internal configurations and address are pre-assigned to the interfaces
- enter the cluster name and hit enter
You can see the message that the cluster is now created
You will need to repeat the same steps on the second controller if you have dual controller in the system.
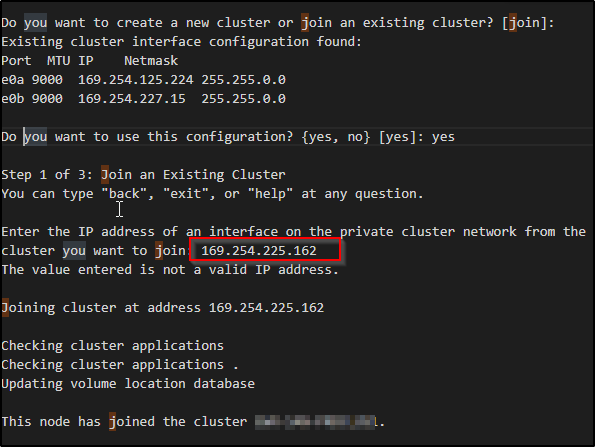
On the second controller you will need to join the cluster instead of creating since the cluster has already been created. you can follow the prompts in the below picture and you will need to add the IP address of the first controller cluster IP, which is highlighted and can be retrieved from the first controller
Don’t forget to install the licencing by using “license add” command

“Network LACP SETUP”
This is where you will need to connect the cables to the network switches.
“Enable CDP”
This will help you track cables on what port is plugged in where and can help in you in troubleshooting if needed
The following command will enable CDP on the controllers
“system node run -node * -command options cdpd.enable on”
This command will show the CDP details when you run it on the NetApp
“run -node * -command cdpd show-neighbors”
You can see the details in the below picture
There are 4 ports that can be port channeled or bonded as LACP. I will explain using two cables for each controller which will give you the combined bandwidth of 20 GB.
Below is the Config that will go on Switch 1 and Switch 2 – The below config is for Cisco Nexus switches
int po 100
switchport mode trunk
switchport trunk allowed vlan “your vlans”
vpc 15
interface Ethernet 1/1
switchport mode trunk
switchport trunk allowed vlan “your vlans”
channel-group 100 mode active
