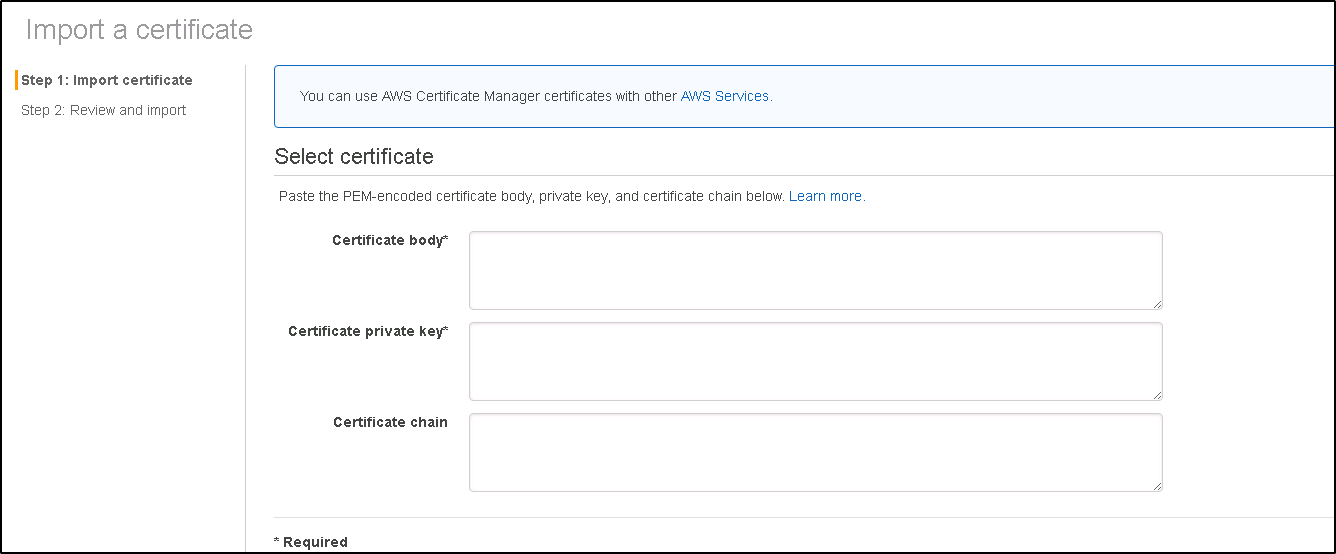
This will walk you thru on how to import the certificate into AWS certificate manger using AWS console. The process is very simple and just requires openssl software downloaded to your desktop and if it is not the right format then you may get the following error message
“com.amazonaws.pki.acm.exceptions.external.ValidationException: Could not validate the certificate with the certificate chain. Choose Previous button below and fix it.”
Once the certificate has been issued from your provider – it should have the following format

You will need the private key and you can refer to my another articles which explains in detail on extracting the private key – see below for the link
Once you have extracted the private key then you will need to convert the root and intermediate certificate which is the top certificate in PCKS format to a format that AWS can understand
below are the fields in AWS certificate manager that you will need text data for

In the certificate body – you will need to open the .pem file and paste the text

In the private key portion you will need to add the text you extracted by running the following command in the article link above, you will need the password to extract the private key however
openssl pkcs12 -in certificate.pfx -nocerts -out private.pem -nodes

Finally you just need to run the following command to get convert the root cert to a AWS readable format by running the following command and paste the text in certificate chain box.
openssl pkcs7 -print_certs -in gd-g2_iis_intermediates.p7b -out root_int.cer
Please note that it may show an error message regarding a conf file, however it will generate a file with .cer and you can use notepad to open the file and paste the text in the “Certificate chain” portion

This will import the certificate and it will be available for you in the certificate manager

Also note that AWS load balancers that are using a certificate using the certificate manager will need to be updated using the AWS certificate manager.
Hope this helps


