What is AAD connect
The Azure Active Directory connect is installed on the Windows server and is used to sync data between your on premise Active Directory and your AzureAD tenant in the cloud.
In AD connect, filtering can be enabled to filter OU, if you are running more than one Azure Ad tenants.
below are the tasks you will need to run to configure the AD connect to add new OU’s to sync
- Login into the server where AD connect is installed and click on AD connect to start the GUI
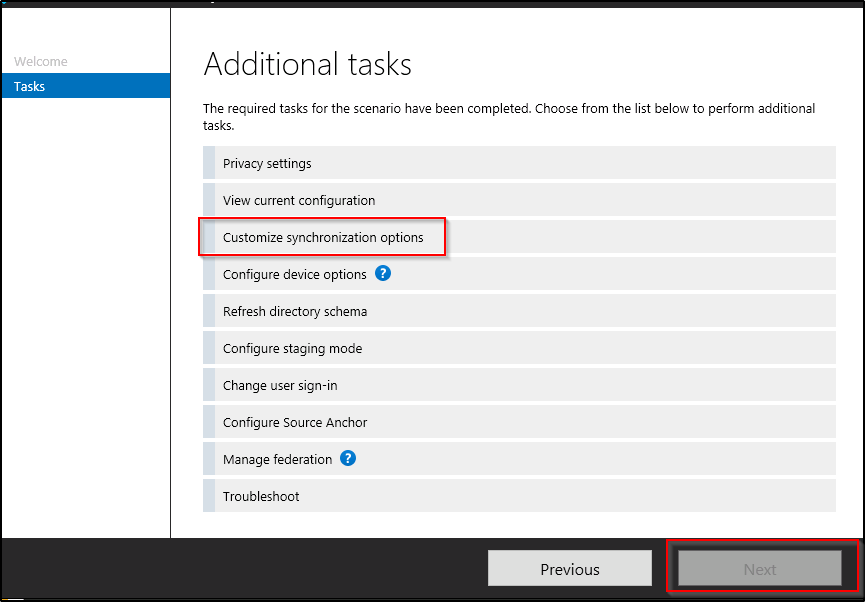
- Once the AD connect launches then choose “Customize synchronizations options”
- Click next to continue
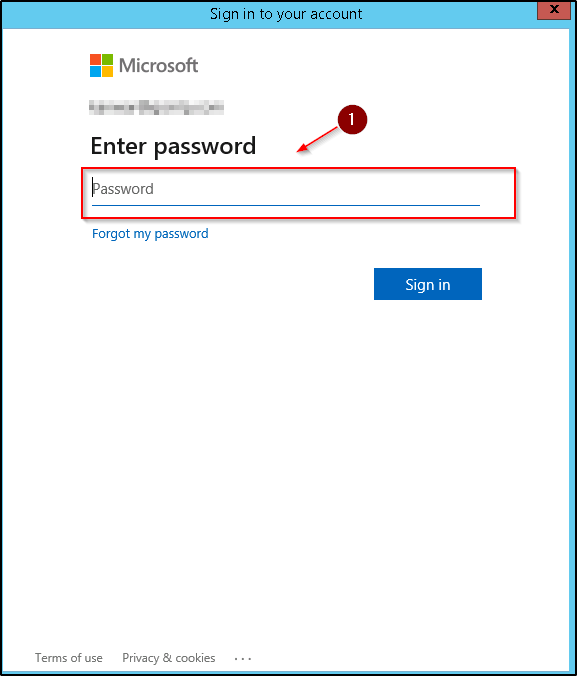
- The next screen will take you to the login prompt and this account has to be “Global administrator” in Azure
- add the global admin email
- enter the password
- choose next to continue

- A new box will pop up where it will ask you again to login using the global admin email
- enter the password to continue to sign in.
- below are the optional features and you can check or uncheck to enable the feature. some may be checked if this was a running AD connect and you are just adding additional OU’s
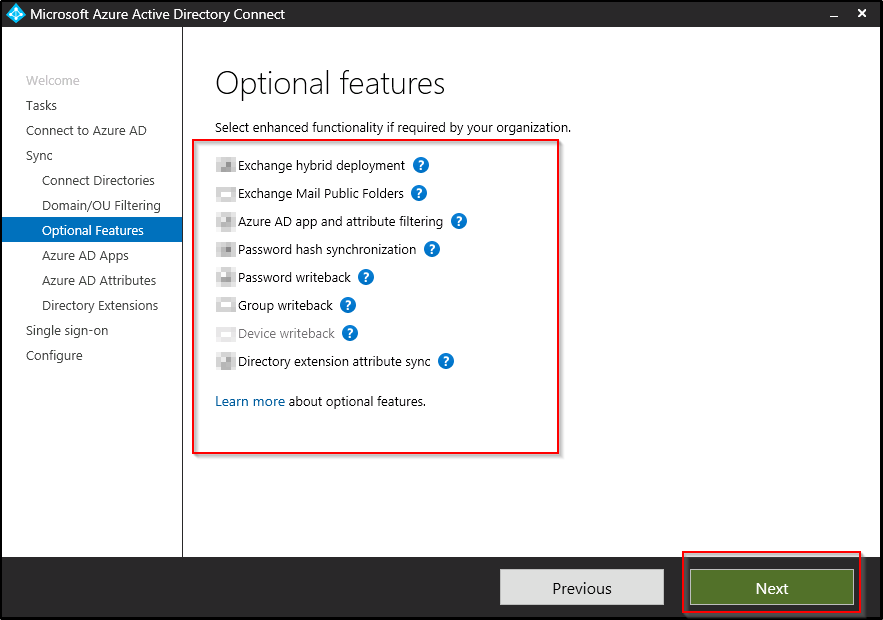
- List of all the apps and they are checked by default.

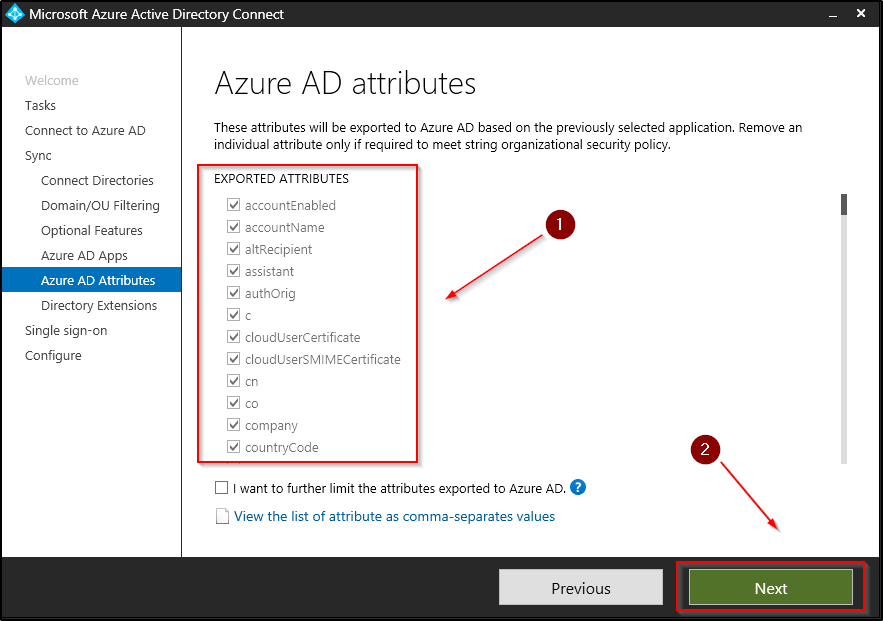
- These are the attributes that will be replicated to Azure AD tenant.
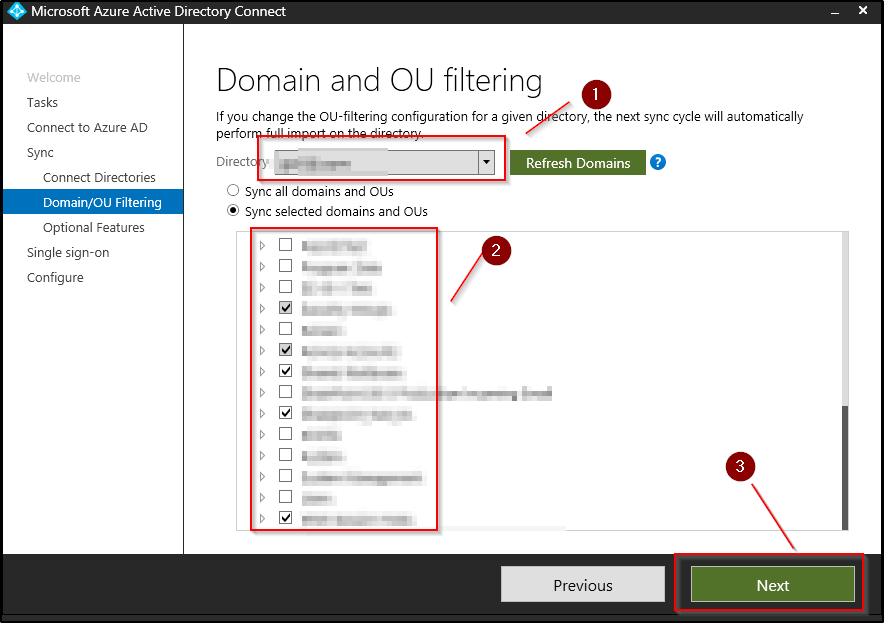
- below is where you will need to chose the additional OU
- Make you this the domain where you are going to be making changes.
- check the additional OU that you want to replicate
- choose next to continue
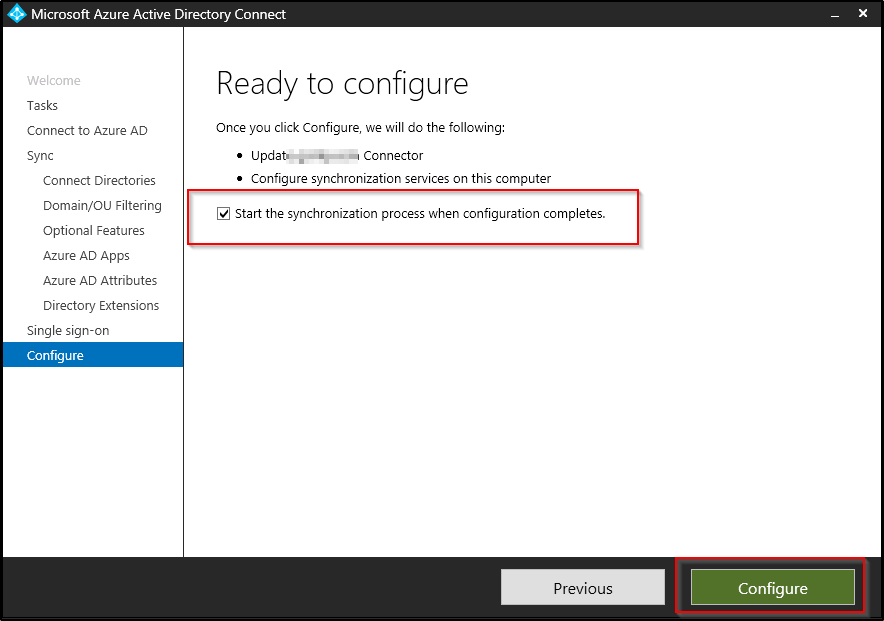
- check the “start the synchronization process when configurations completes.
- Click on configure to start the sync
- Once the sync is complete then you will see the successful message “configuration complete”
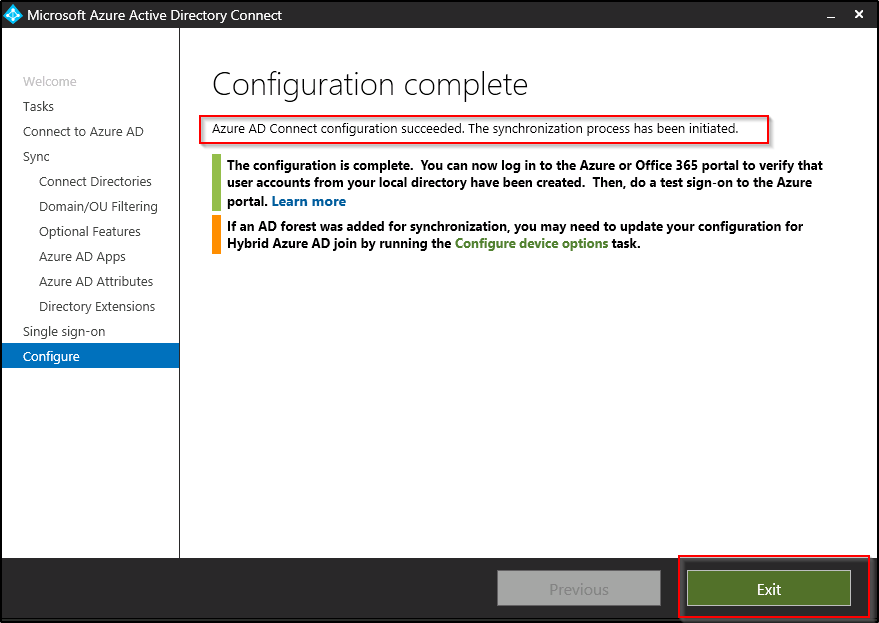
Now you will be able to see the users that are present in the new OU’s.
Thanks for reading this.